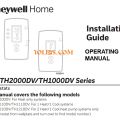
Honeywell Pro 2000 Vertical Programmable Thermostat Manual & Support

Honeywell PRO 2000 Series OPERATING MANUAL
THIS MANUAL COVERS THE FOLLOWING MODELS:
TH2110D: For 1-Heat / 1-Cool systems
TH2210D: For 2-Heat / 1-Cool heat pump systems
(Remove the thermostat from its wallplate to find the model number.)
ABOUT YOUR NEW THERMOSTAT
Your new Resideo thermostat has been designed to give you many years of reliable service and easy-to-use, pushbutton climate control.
Features
- Backlit display is easy to read
- Displays ambient (measured) temperature at all times
- One-touch access to setpoint temperature
- Preprogrammed schedule can greatly reduce your heating/cooling expenses
- Separate programmable weekday/weekend schedules (5+2 day programming)
- Temporary and permanent override of schedule
- Adaptive Intelligent Recovery™ ensures right temperature at the right time
- Built-in compressor protection
THIS THERMOSTAT IS READY TO GO
Simply perform the three steps below and the thermostat is in operation:
- Set the clock. See page 2.
- Select whether to heat or cool. See page 2.
- Select whether to run the fan continuously or only when needed. See page 3.
If you do not wish to use the pre-programmed schedule settings, you can:
- Modify the schedule. See page 3.
- Temporarily override the schedule. See page 4.
- Permanently override the schedule. See page 4.
SET THE CLOCK
- Press the Set button. Set Time will appear on the screen and the time display will flash.
- Press the UP or DOWN button to set the time.
- Press the Set button again. Set Day will flash on the screen.
- Press the UP or DOWN button to select the day of the week.
- Press the Run button to save the changes & exit. (The changes are also saved if you do not press any button for 60 seconds.)
NOTE: The clock has lost its settings when the time display flashes. If the thermostat is following the schedule, it will use the temperature settings programmed for the Wake period of the weekdays until you readjust the clock.
SYSTEM SWITCH
Use the System switch to place the system in one of the following modes:
- Cool: System is in Cooling mode.
- Off: System is off.
- Heat: System is in Heating mode.
- Em Heat: System is in Emergency Heat mode. Only auxiliary heating can be activated. The compressor is disabled. (This mode is available on the TH2210D model only.)
USING THE SCHEDULE
Press the Run button to follow the programmed schedule. For maximum energy savings while maintaining comfort, you can program the schedule such that the temperature is at an economical level when you sleep or leave for work and at a comfortable level when you are awake and at home. You can program up to four periods per day:
| Wake | Starts when you wake up |
| Leave | Starts when you leave for work |
| Return | Starts when you return home |
| Sleep | Starts when you go to sleep |
To program a period, you need to set its start time and its two temperature settings (one when the thermostat is in cooling mode and another one when it is in heating mode). The same settings are used every day from Monday to Friday and another set of settings are used for Saturday and Sunday. For example, you could program all four periods for the weekdays but only two periods (Wake and Sleep) for the weekends.
Honeywell Pro 2000 Installation Guide
System Types
TH2110DV/TH1110DV:
- Gas, oil, or electric heat with air conditioning
- Warm air, hot water, high-efficiency furnaces, 1 Heat/1 Cool heat pumps, steam, gravity
- Heat only
- Heat only with fan
- Cool only
- 750 mV heating systems
TH2210DV/TH1210DV:
- 2 Heat/1 Cool heat pumps
TH1100DV:
- Gas, oil, or electric heat
- Warm air, hot water, steam, gravity
- Heat only
- 750 mV heating systems
Must be installed by a trained, experienced technician Read these instructions carefully. Failure to follow these instructions can damage the product or cause a hazardous condition.
Honeywell Pro 2000 Wallplate installation
Pull at bottom to remove thermostat from wallplate
Remove the wallplate from the thermostat as shown at left, then follow directions below for mounting.
- Pull wires through wire hole.
- Position wallplate on wall, level and mark hole positions with pencil.
- Drill holes at marked positions as shown below, then tap in supplied wall anchors.
- Place wallplate over anchors, insert and tighten mounting screws.
Honeywell Pro 2000 Wiring Terminal designations
TH2110DV/TH1110DV:
- B Changeover valve energized in heating
- O Changeover valve energized in cooling
- G Fan relay
- Y Compressor contactor
- W Heat relay
- C 24 Vac common. For 2-transformer systems, use common wire from cooling transformer.
- R 24 Vac power from heating transformer
- Rc 24 Vac power from cooling transformer